Installation
Install the Octopia Sync module on your PrestaShop store in a few minutes — no command line, everything happens in the back office.
Before you start
- The module ZIP file (
octopiasyncs.zip) - Administrator access to your PrestaShop back office
- PrestaShop 8.x or 9.x, PHP 8.1+, MySQL/MariaDB
- System cron access (for automatic synchronization)
- HTTPS recommended on the back office
Your Octopia API credentials are not needed yet — they are only required to connect the module, after installation.
Step 1 — Open the Module Manager
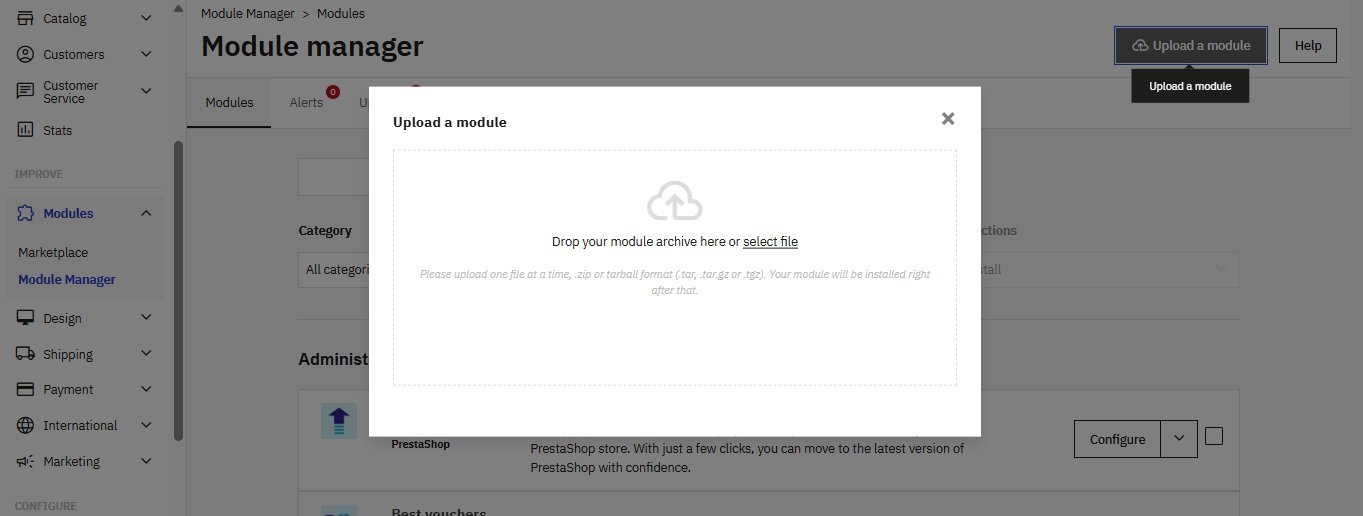
In the back office, go to Modules → Module Manager, then click Upload a module at the top right. A window opens with a drop zone.
Step 2 — Upload the ZIP
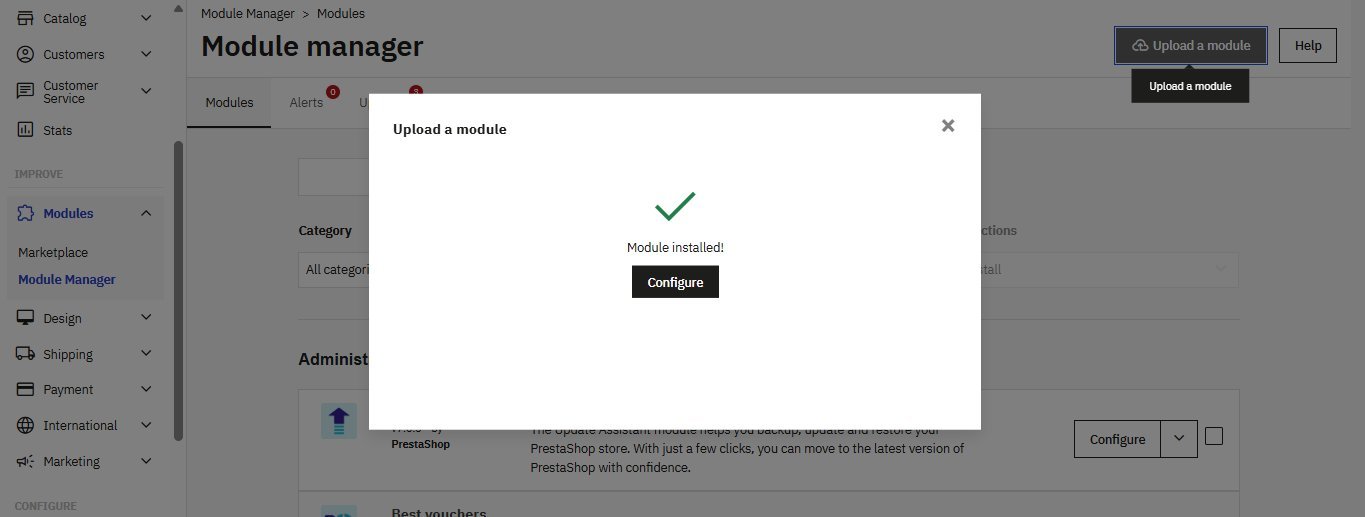
Drag octopiasyncs.zip into the dashed area (or click select file). PrestaShop unpacks the archive and installs the module. After a few seconds, a green check and the message Module installed! appear, along with a Configure button.
If the upload fails
The most common cause is a PHP limit set too low (upload_max_filesize / post_max_size). The module is light (~2 MB): 8M is more than enough. Ask your host to raise these values if needed.
Step 3 — Check the installation
The module adds a single new menu — Octopia Sync — to the Sell section of the back-office sidebar (next to Catalog, Orders, Customers). It groups all of its screens:
| Sub-tab | Role |
|---|---|
| Dashboard | Seller account status and key indicators |
| Orders | Import and process marketplace orders |
| Products & Offers | Push your catalog as offers to Octopia |
| Messaging | Customer messages (after-sales) |
| Configuration | Accounts, profiles, transport, settings, cron, backup… |
If the Octopia Sync menu is there with those entries, the installation succeeded.
What just happened
The module created its database tables, registered its hooks and added the Octopia Sync menu. Your existing PrestaShop data is left untouched.
Step 4 — Open the configuration
Click Configure — you land on the Configuration tab. As long as no seller account is connected, the module shows a Not configured status: that's expected right after installation.
Next step
Configuration → Connection & account — connect your Octopia seller account so the module turns to Connected.
Troubleshooting
The installation loops or fails
- Check the PHP error log (
/var/log/php_errors.logor equivalent). - Make sure the ZIP is the original, not re-zipped (it must contain an
octopiasyncsfolder, not the files at the root). - Module folder permissions:
755for folders,644for files. - If the problem persists, contact support.
The Octopia Sync menu doesn't appear
Clear the cache: Advanced Parameters → Performance → Clear cache, then reload the back office.